THE SEWING DIVAS sewing, design, fashion

July 15, 2009

Hemming stitch by hand

Hemming can be done in a lot of ways, by machine or by hand.

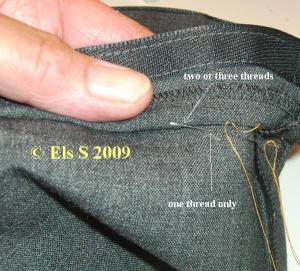
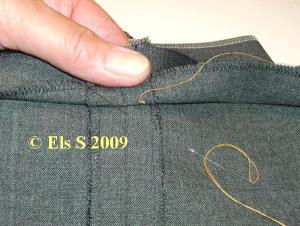
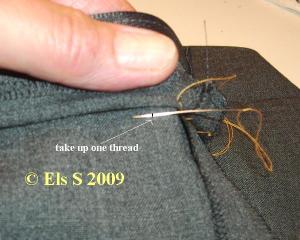
If a garment needs an invisible hem like in woven fabrics, I prefer to hem by hand and to prevent any ridges from the outside I fold the hem edge back about 3/8 inch (1 cm) and work from the right to the left using a fine needle size 11 or 12 depending on the fabric weight. In this example I used Guterman thread and a needle size 11.

The sample pants is just one leg so it is small and can rest in my lap.

The stitches are sewn about 1/4 inch (6 mm) apart and with loose stitches.

I used a yellow thread for better view to show.

The hem allowance I use is a bit more than 1 1/2  inch ( 4 cm) , the hem allowance is marked with chalk and fold down and steam pressed.

For this example I used the same sample which I showed you for the post Fine Men’s Tailoring: pants hemming
1©2©

3©4©

5©

For unlined garments I sew an extra stitch every 3th  or 4th  stitch,

6©7©

Inside view,

8©

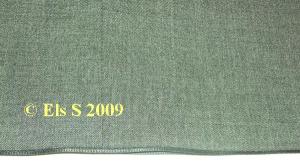
Outside view,

9©

Suggestion:

When you want to press the hem again do it from the inside and press only the hem fold edge.  Do not touch the hem edge with your iron to prevent a show true from the right side .

Sometimes it is easier if I keep my garment away from me on the table instead of in my lap so it looks like this.

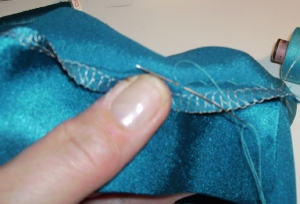
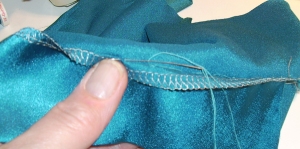
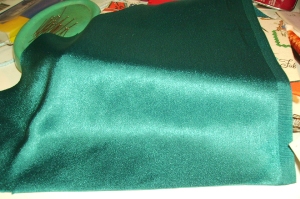
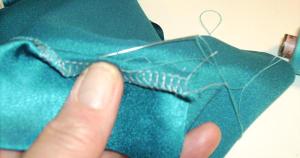
For hemming this lightweight satin I used a size 12 needle and extra fine thread
hemming-1

hemming-2

hemming-3

Wrong side view:                                                                       Right side view:

hemming-4hemming-5

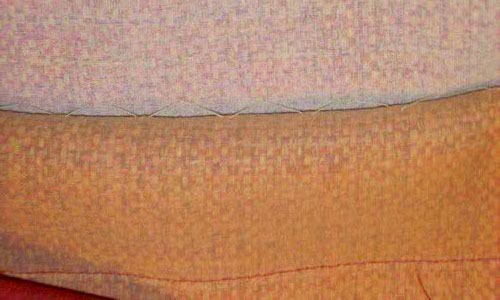
For a hem in garments where the lining hem is attached to the fabric hem,  I use a 2 inch (5 cm) deep hem allowance and use the same hem stitch only this time I fold the hem edge back half way so 1 inch (2,5 cm) and use longer stitches  about 3/8 inch (1cm) , there is no need to sew an extra stitch because the hem is secured by the lining hem.

The machine stitch line at the bottom is the attached lining .silk jacket hem
April 14, 2009

Pocket ( No sagging)

How to make double welt pockets is covered in most sewing books as well as via shared tutorials by other bloggers like by Paco see here and another way here

I will show you another way in another post.

Any slashed pocket like double welt, single welt or welt with flap pockets tend to sag if you actual use them to put something in it. 

 I always tell my husband to never use the outer pockets from his RTW suits except for a piece of paper because those pockets will sag.

But if you make your own suit jacket or coat you can prevent the sagging by using a tailors trick in sewing the pocket bag ( interior)

I learned this trick about 20 years ago during a tailoring course I took from a Dutch tailor, and I have no idea if this way of making a pocket is done by all tailors in Europe but I have never seen this technigue mentioned in tailoring books. So I thought  this trick could be of use for all of  you who are making a coat or jacket with horizontal slashed pockets .For angled pocket openings there are other ways to prevent sagging.

It does not take more than a few seconds, an iron and 2 inch/ 5 cm extra length of  fabric or pocketing for the pocket bag ( Pocketing is a sturdy cotton or  polyester rayon ( viscose)  fabric used for pocket bags)  but the difference in huge.

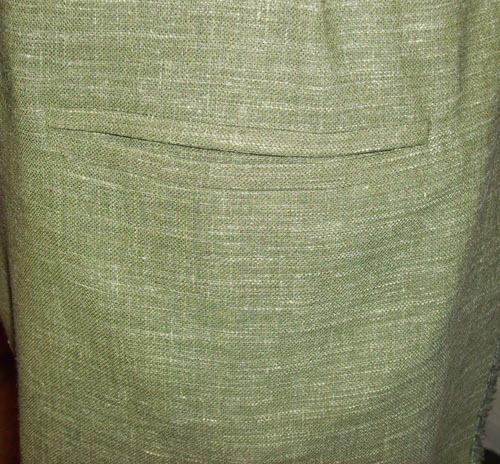
I made a sample double welt pocket and hung the fabric on a dress form to mimic a jacket or coat

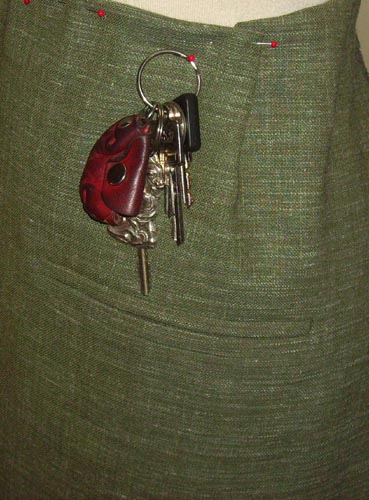
here you can see the keys I used to put  in the pocket

keys 

 pocket sagging due to the weight of the keys,

pocket-saggs

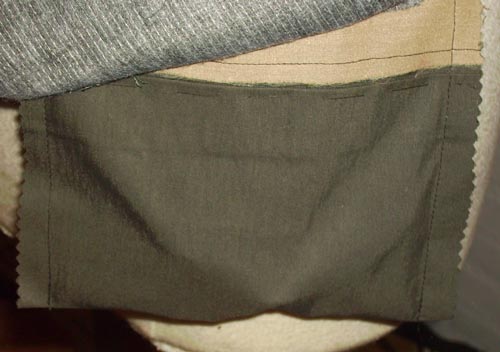
The inside view of the bag with the keys inside

 inside-keys-

(more…)

April 10, 2009

Jacket Watch

Filed under: Designing,Inspirations,Musings,Tailoring — georgene @ 8:50 pm

More coverage this week of what The Ladies Who Lead are wearing – there’s always lots of coverage over at the Huffington Post, in their Style section on the right side of the home page. Sometimes it’s more than just fluff pieces or photo essays. Michael Henry Adams has an interesting piece with some historical background with photos on Eleanor Roosevelt and perceptions of the First Lady. Readers of Cathy Horyn’s On The Runway blog over at the New York Times chimed in with 6 pages of comments so far on her latest post about the First Lady’s fashion choices. It’s a hot topic, and there are a lot of different opinions.

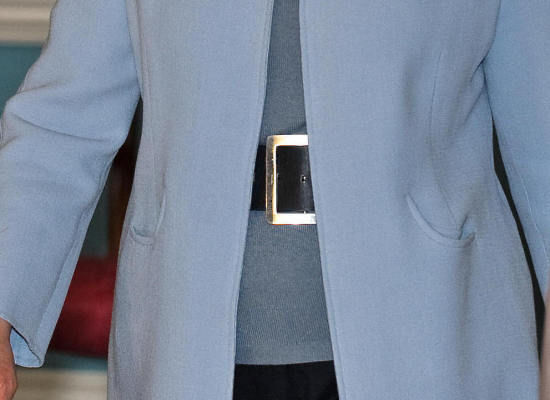
There is also a rather breathless piece with photo essay, with a headline that Hillary Clinton is ‘channeling’ Michelle Obama because she wore a silk flower and a wide belt under her jacket. dove-grey-jkt

I am not sure I would go so far as to suppose that HRC is taking fashion cues from the First Lady. A silk flower pin does not in any way remind me of the sparkling pins that Obama tends to wear. You may remember that Madeline Albright was known for her vast collection of brooches when she was Ambassador to the UN, and later as Secretary of State in the Clinton administration. the Museum of Art and Design in NYC will be showing an exhibit of Albright’s pins in Sept. of 2010: Read My Pins, The Brooches of Madeline Albright.

I love them too, and have been working on my collection for many years. A pin can make all the difference on an otherwise bland outfit. For a bolder statement you can put a bunch of them on, or pile on several silk flowers in related colors massed together as a bouquet.
dove-grey-jkt-neck-shld
Her dove grey jacket is really pretty – she was at an event with the Prime Minister of Australia this week.

Notice the center front zipper, the shawl construction turnback collar, and the center sleeve seaming. The smile pockets are a nice touch. I really like the fit on this jacket, softly shaped, none of the tightness in the sleeve from last week’s London jacket.

dove-grey-jkt-2

The monochrome pale grey palette is lovely, with the shades of grey reflected in the silk rose, the darker sweater underneath, and the belt we see peeking out from the jacket at the waist, not to mention the darker grey pearls.
dove-grey-jkt-waist-detail

Here’s how I imagine the technical sketch for this jacket. Its worth noting that the ¼” topstitch needed to make the zipper work is carried out at the cuff, hem, as well as down the center front and collar turnback. I am sure that there are nice big facings everywhere, but the ¼” topstitch gives it a nice unity.

jacket-sketch1

April 7, 2009

“Not Couture” Jacket Diagnosis

Filed under: Fit/Pattern Alterations,sewing,Tailoring — georgene @ 11:02 am

jacket1

Here’s what I imagine the technical sketch for Hillary’s jacket looks like.

It’s a bit like diagnosing a patient you’ve never seen in real life, but here are some possible approaches to fixing the problems we can see in the photos.

BODY

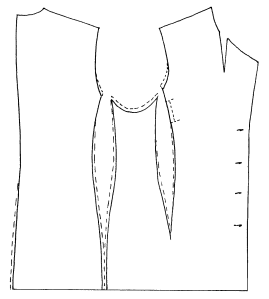
body-adjustment
The armscye looks like it needs to be raised so the base of the armhole is not so low. Higher armholes can increase the movement range in a jacket sleeve, if there is enough ease in the sleeve as well as the body of the garment. One of my pet peeves in RTW is the plague of low armholes in larger sizes. Just because a person has more girth does not mean that the armhole has to get closer to the waist….in fact that has the opposite effect of causing the sleeve to tug and bar across the arm, as well as distort the side of the jacket when the arm is not at rest by the side of the body.

It’s hard to say whether Hillary is truly a petite fit in the upper torso, but certainly for this garment we could take some length out of the armscye. So let’s raise the armhole up a bit.

We could use some more length in the front as well, as the hem is hiking. It’s possible that an actual full bust adjustment is in order. Some length could be added and a small dart eased in at the side bust along that vertical dart that goes into the pocket.

The high hip and low hip (at 4” and 8” from the waist, respectively) could use a bit more ease. I would distribute that on all of the vertical seams, as well as adding a wee bit at the center back seam.

SLEEVE
sleeve-adjustment
The sleeves are a bit more problematic, as we don’t want to add to length in the armscye, but we do need more girth at the bicep. I would fold out some length in the cap to account for the raising of the armhole.

This drawing shows how you might add to girth with a bit of slashing and spreading without adding to the circumference. You might have a bit of additional work easing in your elbow dart, but that can be managed.

December 11, 2008

Facing for invisible zipper

Filed under: Dressmaking,Els,sewing,Tailoring,Tutorials — Els @ 4:36 pm
Tags:

This work is licensed under a Creative Commons Attribution-Noncommercial-No Derivative Works 3.0 Unported License.

zipfinish-inside

There are a lot of ways to sew a facing in a garment with an invisible zipper.

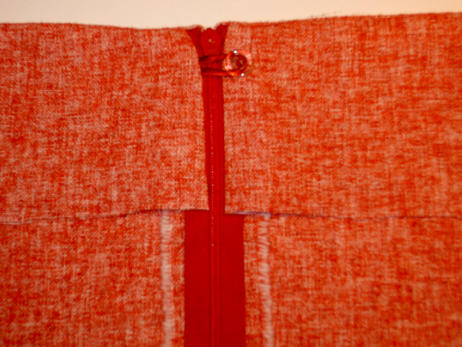
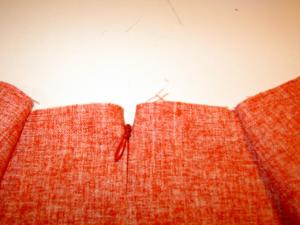
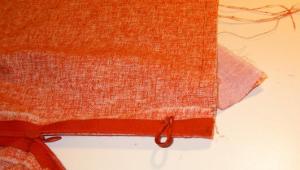
I will share my way of finishing a facing with an invisible zipper this be used for any facing, like a faced neckline, skirt or pants waistline. I always add a small flat button and fabric loop at the top to reduce the stress of the zipper. (the fabric loop is made of bias cut lining and steam pressed into a small flat loop shape)


 zipfacing-2

Cut the facing the same length as the waistband including the seam allowance.

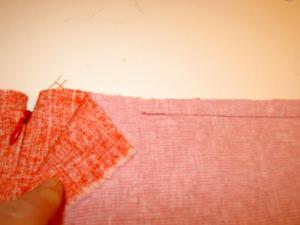
Sew the facing at the waistband but leave the first 3 inches (7,5 cm) from the zipper on both sides free, these will be sewn later.


zipfacing-1

 zipfacing-3

If you want to add a button and fabric loop, sew the fabric loop at the zipper tape about 1 cm below where the zipper pull if the zipper is zipped up. For this example for a skirt I sewed it at the left side.

zipfacing-4

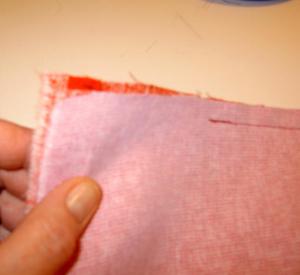
 The facing seam allowance at the top should be moved/angled about 1 cm away from the seam allowance of the zipper.

The lower part of the facing matches the seam allowance.

Sew the facing at the zipper tape

zipfacing-5zipfacing-6

If you plan to line the garment, do not sew the last ½ inch (1,5 cm) from the facing, so you can insert the lining at the facing bottom later.

zipfacing-7zipfacing-8

zipfacing-9

Push the zipper coil flat and fold the zipper towards the facing part.


zipfacing-101


zipfacing-11

 Stitch the remaining facing at the waistline but do not back stitch. 

zipfacing-12

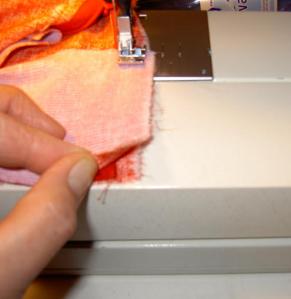
Turn the facings to the inside, and check if the stitching line of the facing is even.

If the facing is even on both sides turn the facing again towards the inside and back stitch , grade the seam allowances and cut the corners at an angle. 

 zipfacing-13


zipfacing-141

 zipfacing-15

zipfacing-16


Finish the faced zipper by sewing on a flat button.

zipfinish-inside

zipfinish-outside

Next Page »

Blog at WordPress.com.