THE SEWING DIVAS sewing, design, fashion

February 26, 2008

Elasticated blindstitched neckline finish

Filed under: Gigi,Machines,Tutorials — Gigi @ 1:36 pm

I really love making and wearing surplice neckline tops and dresses. To prevent the neckline from gaping I usually serge a plain lingerie elastic to the wrong side. Once turned in the neckline can then be topstitched or, as I often prefer for a dressier finish, blindstitched by machine. This is by no means a couture – or even fine – finish but it is very nice on sportswear.

First, the machine. This is a true blindstitch machine with a curved needle. Mine is a portable TacSew T-500 that is not as expensive as you might think. I use mine quite a lot. It’s great even if all you do is hem with it!

tacsew

Here’s a link to the T-500 on All Brands. $399 is a great price for this machine! I see it locally for $600-800.

STEP 1: Put the lingerie elastic through the serger for a couple of stitches to secure it.

blind1

STEP 2: Insert your neckline edge and serge the elastic on.

blind2

blind3

STEP 3: Turn the elastic in and machine baste into position on your conventional machine. This may seem like an unnecessary step but it takes so little time and ensures that the elastic doesn’t twist or slide around during blindstitching.

blind4

blind5

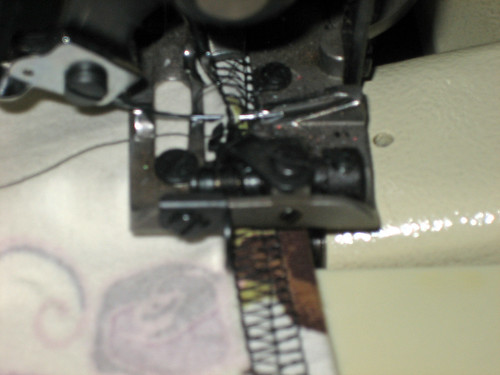
STEP 4: Blindstitch just catching the edge of the elastic with your needle.

blind6

Now you can remove the basting stitches. I use a really loose top tension to make it very easy to take out.

After blindstitching:

blind7

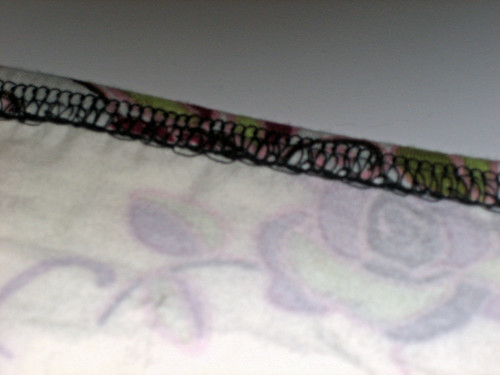
The finished product! I used contrasting thread here but had I used matching thread and a white elastic the finish would be virtually invisible. The busier the print, the less noticeable the tiny stitches will be. Also, a blindstitch has plenty of stretch to it making it perfect for hemming knits as well as wovens. It’s great if you are making a top or dress out of a fine knit such as wool jersey or cashmere where you don’t want to use a coverstitch or twin needle.

blind8

Here’s how it looks on a real garment:

burdadress

You can read more about the dress HERE on my personal blog.

Now, I have not tried this technique using the stretch blindhem stitch on my conventional sewing machine. I imagine it would work okay as long as you get the settings just right. I would experiment on scraps first. Better yet, treat yourself to a true blindstitch machine!

February 23, 2008

Faking It

Filed under: Accessories,Embellishment,Fashion,Inspirations — phyllisc @ 12:07 pm


For the past new years I’ve been building a collection of  costume jewelry and I want to spread the news that (1) costume doesn’t mean ugly, and (2) costume doesn’t need to mean cheaply made.

I’m not a huge fan of fine jewelry; mostly because the pieces I do like are way out of my price range, and the pieces that are in my price range are kind of twee and bland for my taste.  Give me costume any day!

The necklace above is a foray into faux tortoise; it’s a Liz Claiborne piece from Macy’s.  I do wish it were a bit longer,  but that’s easy to change because I can go to A.C. Moore and just buy chain to make an extender.  The resin and Swarovski crystal bangles are Kenneth Jay Lane and are brand new on QVC.com  – aren’t they fabulous?  I really want them and they also come in clear and black in addition to faux tortoise and black.  I may also look for a nice silver chain necklace with big links to wear with this; I like to double up necklaces.

 I wear my faux Chanel jacket all the time with these pieces; the pearls came from the Store Who Shall Not Be Named, the Voldemort of Retail.  This strand is 48 inches long, perfect for doubling up.  The glass pearls are nice and heavy, and each is individually knotted.  The black & silver necklace was made by RivkasMom on Etsy, and it’s made from a gunmetal chain,  lava rock beads, and the beads are embellished with Swarovski crystals.

Somestimes I wear just the pearls along with this brooch; it’s Monet from about 2-3 years ago.

The necklace on the jacket below I found about 2 years ago in Filene’s Basement; I love the bold colors,  and the way it nicely fills in a neckline.  The brooch is 20 years old at least, I think it’s Catherine Stein but it’s unmarked and I forgot who made it long ago.

I’m always on the look out for cool costume pieces, and good sources include Etsy.com, QVC.com, as well as discounters like TJ Maxx and Marshall’s.  Costume jewelry gets marked down pretty fast, and you can get some great deals.  The most expensive piece here was $60.

February 21, 2008

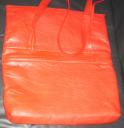
Leather shoulder bag.

Filed under: Accessories,Bag,Closures,Els,Leather sewing,sewing — Els @ 10:56 am

 front1.jpg
For this shoulder bag I used 2  brick-red leather hides, both were about 7 ½ foot large. This bag is a rectangle shape, zippered pocket on the front partly hidden under the flap and one zippered pocket at the backside for easy access.

Plus an inside pocket at the backside of the lining bag and a key lash stitched at the side seam of the lining bag.
I drafted a rectangle shape on paper with a fold over flap and measured my leather to see if I had enough leather, copied the rectangle paper pattern and add the several pieces for the pockets front and back and added a small piece to attach the shoulder straps, added seam allowances (3/8 inch (1 cm)  for the side seams and 5/8 inch (1,5 cm)  for all the other seams).
After  cutting out the pattern parts from the interfacing I taped the paper pattern still with the interfacing pinned ontoo the leather with some medical paper tape.

 The small pictures are all ThumbNail , just click and you see a larger image.

pattern-layout.jpg

I made a long shoulder strap so I could wear this bag also crossed over. The strap is sewn with 3 pieces to get that extra long length.

The size of this bag is 17 inch (43 cm) wide, 12 inch (30 cm) high.
The total height is 17.7 inch (45 cm). Bottom depth is 2.4 inch (6 cm).
Shoulder strap is 59 inch (150 cm) long and 1 ¼ inch (3 cm) wide, so I also can choose to wear it crossed over. Outside pockets are 13 inch (33 cm) long and 6 1/8 inch (16 cm) deep.

I started with fusing leather interfacing to all the parts except the shoulder straps.

This non-woven interfacing is special made for leather because it can be fused with a low heat iron.
The bottom part and the part where the shoulder straps are sewn between are fused with a heavy hair canvas interfacing for some added strength.

extra-layer-interfacing-bottom-a.jpg

All the seams are stitched and glued and flattened down before any stitching from the right side.

The zippers are sewn at the pocket openings, between the already closed seams.

stitched-zipper-tape-not-yet-glued-a.jpg double-sided-adhesive-tape-a.jpg adhesive-tape.jpg pocket-lining-glued-a.jpg  inside-bagopening-after-stitching-a.jpg

I marked the seam allowance wide with a pencil (by folding the allowance back to the inside with the zipper teeth just inside the fold line) and glued the fold line of the zipper/pocket opening. The marked pencil is a guidance line only.
 
Then I used craft double-sided adhesive tape cut in half (because I only needed a narrow piece) to attach the pocket lining over the zipper-tape. Raw sides of the pocket lining and seam allowance match.

From the right side I sewed the zipper and the lining pocket (sandwiched stitched)

zipper-closure-lining-stitched-a.jpg 

pocket-lining-stitched-a.jpg pocket-zipper-a.jpg

Now the other side of the pocket lining and zipper are stitched. The next step is sewing the pocket lining pieces together to form a pocket.

The lining for the bag is interfaced with a woven interfacing for adding some strength.

linterfaced-lining-bag-1-a.jpg
The leather is sewn with my new purchased “used” Singer 20U machine, Güterman strong polyester thread size 100 and sewing machine needle size 14/90.

singer-20u-a.jpg  needles.jpg

I used several sewing machine feet for sewing this bag.

The Teflon and roller feet are great for sewing leather. I also used the Right Hinged Narrow Cording foot and glued some Teflon tape under the foot for top-stitching the shoulder strap at the center.
The Right Compensating Top-stitch Foot was great to edge stitch the shoulder strap.
Lining leather for reinforcing the magnetic snaps and to cover them so the metal parts will not weaken the lining.

magnetic-closures-inside-a.jpg magnetic-closure-lining-leather-reinforcement-a.jpg covered-magnetic-closure-1-a.jpg

The inside lining pocket 7 x 7 inch (18 x 18 cm)  is from a double layer of lining with the opening at the fold line which I glued down with a strip of double side fusible hem tape. The pocket is stitched around right sides together but I left a small part open at the bottom to turn the pocket inside out. Pressed and edge stitched at the lining bag.

There was some leather left but it was damaged, but I could use this part and cut around the damaged spot and add some color to the inside pocket. I made a template 3/8 inch (1 cm) wide and 3/8 inch ( 1 cm) wider than the length and wide of the pocket so the edges of the pocket is covered by nearly 1/4 inch (1/2 cm) and stitched the leather around the pocket edges.
I used a Pritt glue stick for temporarily securing the leather around the pocket edges and used the zipper foot to stitch it close to the edges.

template-for-pocket-a.jpg

inside-pocket-lining-b.jpg

For the bag opening I used a different zipper a non-separate one which can be used for garment sewing like in a a dress. This zipper has a smaller and narrower zipper coil, which does not add weight and is more flexible for the purpose of this bag.

closure-bag-a.jpg
The zippers I used for the pockets are separate ones which are sturdier.

front-pocket-a.jpg    shoulder-straps-top-stitched-a.jpg back-height.jpg

The only hand sewing I did was finishing the last inch ( 2,5 cm) from the pocket lining seams towards the top side,
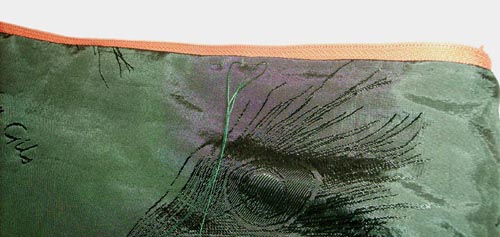
prickstitch-lining-bag-b.jpg

 prick stitched the lining bag at the zipper tape at the bag opening so it will stay put,

secured the lining side seams about halfway down with a couple of stitches towards the leather side seams and sewed a few stitches at the bottom of the bag to attach the leather and lining bottom together.

final-sewing-a.jpg
I closed the opening in the lining bag side seam, (which was needed to turn the bag inside out) with a ladder stitch.

Since the inside of the shoulder strap was not as nice butted together as it should be, although I tried to do it right by marking a line at the center where the edges would meet eachother.

shouler-strap-glued-a.jpg

I noticed that after stitching  a hairline away from the center edges with the zipper foot and topstitch from the right side along the outer edges there was a small gap which showed the natural leather color.

 I bought some leather colored polish to fill in the gap. I was lucky that the color brick red is the same as the bag. Used a narrow tiny brush to “paint” the gap between the folded and stitched edges to cover the natural brown suede leather which on some spots was visible.
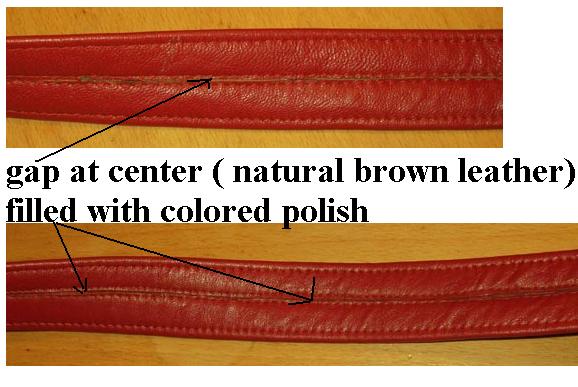
inside-shoulde-strap.jpg

Also a bag stop was glued at the center of the inside shoulder strap. This bag stop prevents the strap from gliding of my shoulder.

bag-stop.jpg


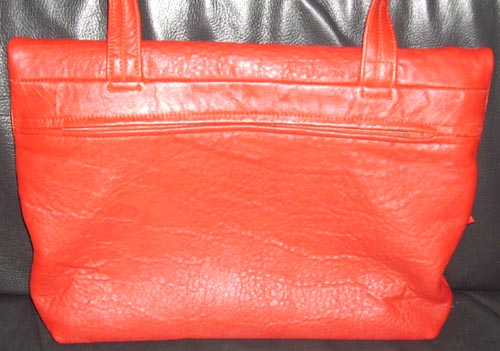
    back-b.jpg        

 This last thumbnail picture reflects the true color of my new bag the best.    
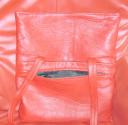
 

back-pocket.jpg


 A high quality fusible interfacing also for using on leather is

 Pro_Tricot fusible interfacing from http://sewexciting.blogspot.com/

Separated at Birth

Filed under: Designer Inspirations,Fashion,Vintage Sewing — phyllisc @ 8:58 am

Our good friend from Barcelona, Paco Peralta, sent me this photo of the Balenciaga dress that inspired my vintage cashmere coat.

February 15, 2008

Issey Miyake wrap coat

issey-miyake-coat-front-a.jpg

This Vogue pattern 1476 was in my stash for several years now waiting to be made.
The coat takes a lot of fabric 4,5 meter which should not have visible difference in a right and wrong side and finally I found the fabric on sale a woollen tweed 80 % wool 20 % acrylic for only  € 7,95 per meter.

And sinpattern-parts-a.jpgpattern-parts-a.jpgce I needed a lot of fabric the fabric weight was important too ,so if you want to make this pattern look for a kind of drapery fabric.

This pattern although it looks quite unusual is very easy to sew.

 pattern parts apattern-parts-a.jpg

The pattern has only a few pattern parts but need a lot of space for the layout. I used two tables side by side for the layout and cutting.
The fabric is cut on the crossgrain instead of the usual length grain.

Since I am nearly 6 foot  (1.81cm) I lengthened the pattern at the coat and sleeve part and add some length to the yoke part.

 added length coat patternadded length coat patternadded-length-coat-pattern.jpg  yoke-sleeve-pattern.jpg

Vogue gives instructions how to sew this pattern but I did not like to do a lot of top-stitching so I skipped that part. Since my fabric is very easy to ravel I start serging all the seams first. I used a three thread serger seam which makes it easier to fold that line to the inside and press it down.

I lined the yoke/ sleeve part and the pockets , also made an inside pocket from the lining.

I also altered the pockets design, the pockets pattern is a rectangle shape, but I decided after I made and lined them I did not like them. So I made a new pair of pockets, the instructions are not for lined pockets just fold the seam allowance in and top-stitch but I like my pockets lined so I did.

 new-pocket-right-side-a.jpg       newl-pocket-wrong-side-a.jpg

The inside pocket is stitched behind the outer pocket which I thread traced first to know where to stitch the inside pocket.

inside-pocket-a.jpg 

 Also added a pair of tailored shoulder pads,( sewn  between the lining and the fabric) to balance the wide of the coat.

Fused strips of  interfacing at the front edges at the seam allowance, which are cut on the crossgrain for stability.
I did not top-stitched the facing of the sleeve hems, but bind the edges with bias cut lining and hand-sewed the hem facing.

I lined the yoke/sleeve part which is helpful to wear the coat it slides more easily over the garments like a sweater since there is a lining attached.
The lining is sewed by machine sandwiched between the yoke and back coat pattern, and hand stitched along the neckline and sleeve part.

 lined-back-yoke-and-sleeve.jpg  lined-yoke-sleeve-front-part.jpg
I sewed a loop at the neckline for when I travel by train where there are no cloth hangers around.
I did use a large 3 cm snap to close the coat.

 3-cm-snap-a.jpg 
Sewed the male part at the underlay and the female part at the overlay but decided to remove them and switch to a different way of attaching the snap because I did not liked the visible way of the snap when the coat is worn without the closure.

Te large 3 cm snap has a deep hollow part that was visible from the outside( imprint)

detail-imprint.jpg

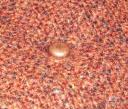
The female part is sewn from the inside with a backing of a circle of silk organza for stability and the male part is pushed between the wool threads so that part is only visible and useful.

male-snap.jpg 
The female snap part, which has a deep hollow side I filled with 2 pieces of felt so it does not leave imprints after sewing the snap on.

  snap-felt-circles.jpg    felted-snap.jpg  female-snap-1.jpg  female-snap-2.jpg  

Also a backing from silk organza is used for reinforcement.

side-back.jpg back.jpg wide-of-back.jpg  front.jpg

Next Page »

Create a free website or blog at WordPress.com.