THE SEWING DIVAS sewing, design, fashion

December 11, 2011

Shingo Sato Designer part three (Trompe L’oeil)

Another post about an inventive design by Shingo Sato, but this one is not as long as the previous one.

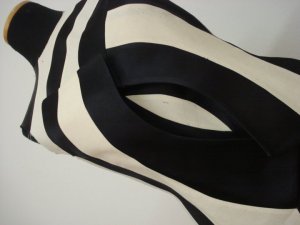
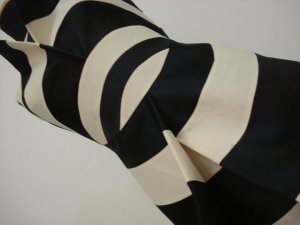
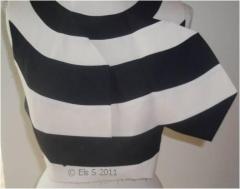
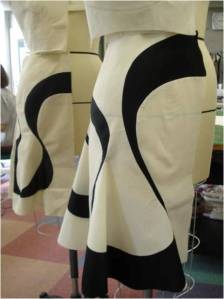
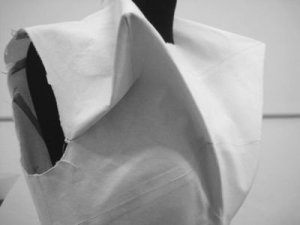
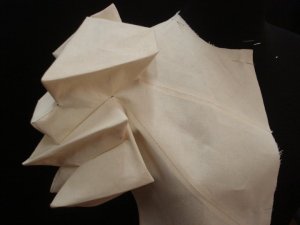
 Trompe L’oeil which is French for Cheating the Eye (aka optical illusion).


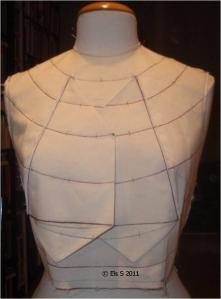
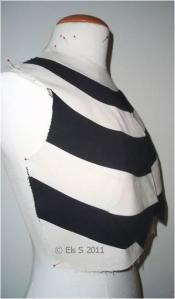
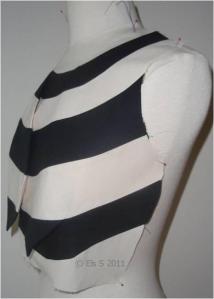
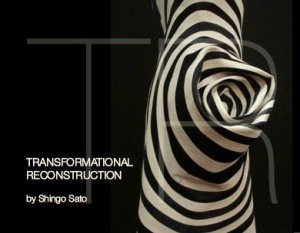
The examples like the pictures above are described in the book and accompanied video “Transformational Reconstruction” which I mentioned in the first post about Shingo Sato

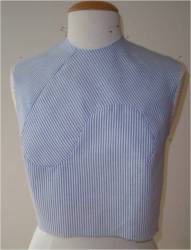
I was very interested to see how such a design was made so after watching his video on you tube, I made the top a few weeks ago. I used cotton in unbleached and black to make this toile. Imagine such a design in black and cream colored satin.

As you can see the two flaps are integrated in the design. I took some pictures  during the process:

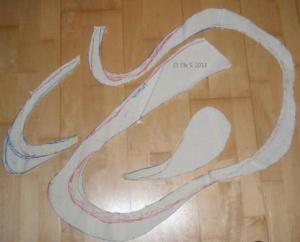
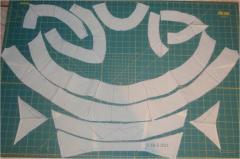
Two flaps which are sewn on both sides of the flaps      trace around the flaps                 design lines, reference marks


Left side view,                                               design lines cut                                                     final pattern parts (11)


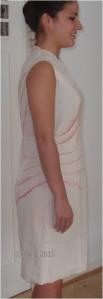
right side view                                           left side view


Left flap open                                                       Both flaps open                                              Right flap open


Wonder how this genius pattern is made watch TR Cutting School -Trompe l’oeil technique


December 9, 2011

Shingo Sato Designer part two

The moment I saw the green dress on Shingo Sato’s website   I felt the excitement to try to copy that dress using “Transformational  Reconstruction” (aka design on 3D)

See the previous post Shingo Sato Designer

At the end of last year 2010 I was invited to make a garment as part of the Dutch tailors catwalk show for the International Master Tailor Conference which would take place in Rome Italy in August 2011. So now I found the opportunity to make such a dress.

My model who would show the  dress in Rome, lives in Amsterdam while I live 200 km away so I was happy with my dress-form, although my model has a more nicely curved body.

I found the right fabric for the dress (“Balestra” which is a high-end quality 100% polyester satin back crepe fabric and both sides can be used since it has a matt and a shiny side. This fabric is often used for evening  and bridal wear.

And I bought a cheap satin back crepe in purple for my test dress.

I drafted a basic dress and my adventure started.

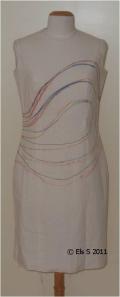
After fitting the basic dress I could start with the design. But since I am not used to draw (permanent) lines onto a 3D form, I started with pinning wool yarn threads instead. The advantages of using wool yarn threads above the permanent pen lines are obvious.

The wool yarn threads could be rearranged easy without having multiple lines on my basic dress that could make it difficult to see the final result.

When I was satisfied with the design lines on the dress-form, and it really helps if you stand away and take another look.   (The perspective is different from viewing in front of it like an arm length away).

(I also used “Paint” to highlight the shiny parts on the pictures on the computer) and I traced the wool yarn lines with a pen.

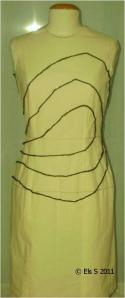
      

Putting the dress on my ironing board I was able to smooth out the design lines with a curved ruler and marked the reference points. After cutting out the pattern I placed the pattern pieces on the purple fabric matt side and some parts on the shiny side.

Since this one would be my test dress, I could use a tracing wheel and tracing paper to mark the seam lines and reference points. I used 1 cm seam allowances.

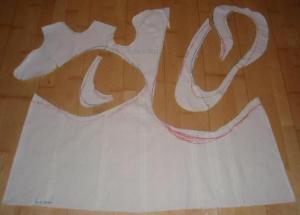
Detail view of one of the cutout shiny parts where you can see the reference marks, side seam mark:
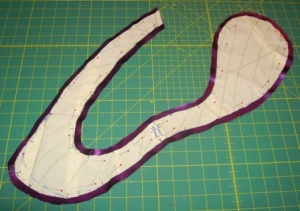
The new dress design has design lines which are not corresponding at the end points of the darts  so learning how to deal with that the video easing and forming was helpful.

During the next fitting I was not really pleased with the design lines; moreover, the dress was too tight, probably caused by the shape of the pattern parts (some are cut at the bias due to their shapes).

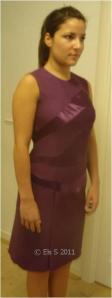
   

So I marked some new design line points and started with a new drafted dress pattern but now with more wearing ease that would vanish into the design.

The second test dress was better in the fitting but needed some rearranging of the design lines which I could do at home using my dress -form.

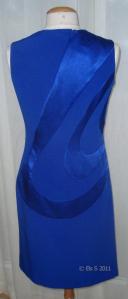
The blue lines are the permanent lines which I used for the final dress in blue.
     

pattern parts matte side :                                                                        pattern parts shiny sides:
I was pleased with the final outcome on the dress -form                   Vanished extra wearing ease test dress versus final dress

see below:


Unfortunately when my model was trying the dress for the last time, some wrinkles appeared due to the bias cut pattern parts.

Obviously the purple fabric was a bit heavier than the blue fabric which I should have known but did not recognize in time. Otherwise I should have fused all the pattern parts with a thin fusible interfacing to prevent the wrinkles due to all the curved lines.

But it was too late to make a new dress since the dress was going to Rome in 3 days.

Well lesson learned for the next time.

It was an experiment and a lot of work but I liked the new take on designing the dress on 3D and I enjoyed making this dress a lot.

So thank you Shingo Sato for being an inspiration  in my process to make a dress using this TR designing technique.

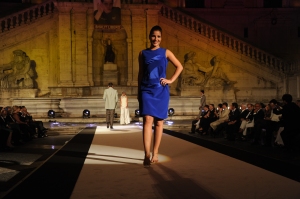
The picture of my model on the catwalk at Piazza Campidoglio in Rome Italy August 9 2011.
December 2, 2011

Shingo Sato Designer

Filed under: Designer,Designer Inspirations,Designing,Els — Els @ 4:53 pm

A year ago I discovered on the Internet Shingo Sato a Japanese designer and instructor, and was immediately fascinated by his approach in designing a pattern, which he calls “Transformational Reconstruction“.
His approach to design is not new, since we patternmakers know how to transfer darts , add style lines etc but it has limits because drawing a pattern design on paper has less creative possibilities.

Shingo Sato’s design process “Transformational Reconstruction” which is done in 3D gives so much more possibilities to be creative.

Shingo Sato shares his designing process by giving workshops  in various parts of  the world like in the USA, UK, Colombia, Japan, Italy.

But he also shares his work via YouTube via numerous video’s ( at this moment he added 34 video’s)

It all start with a good basic pattern which you can accomplish by moulage/draping or drafting by hand on the flat ( paper pattern. The basic pattern which is sewn from unbleached cotton will become a new pattern after the design lines are added on a dressform.

Shingo Sato often use wavy or geometric lines for a design but also builds a pattern using his “Architectural Reconstruction”

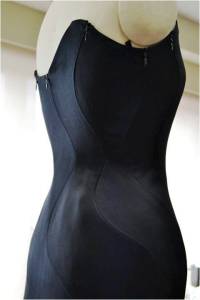
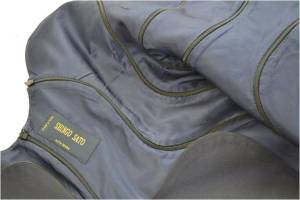
Example of a dress design which is in my view and amazing design with all those beautiful wavy lines the dress has 8 invisible zippers which are not that difficult to sew but impeccable sewn in wavy lines is a master piece.


( I wonder if Japan has other more flexible invisible zipper brands which are more easy to press into shape than the ones we know like the brands Opti and YKK)

You can watch his video channel:  http://www.youtube.com/user/trpattern

website: http://www.trpattern.com/

I ordered his book Book “Transformational Reconstruction”  published and sold by Centre for Pattern Design shows 12 chapters and  2 accompanied dvd’s.

The book can also ordered from his website but you need to understand Japanese language.

If you would like to try designing a pattern using TR, start simple like this one which I made:

You can view how this is done here

I also made a dress and a top inspired by his TR design process and will post about that within a few days.

Enjoy watching the YouTube video’s and learning  this way of pattern designing.

Shingo Sato is also on Facebook and he will start a TR Cutting school in Milan Italy next week where you can attend workshops, see  link for more  information.

Thanks to Shingo Sato for your amazing work which helps to be more creative in pattern designing.

July 3, 2011

Jean Paul Gaultier


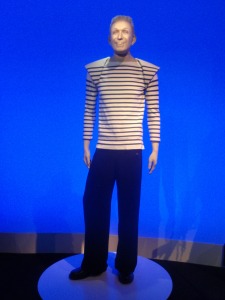
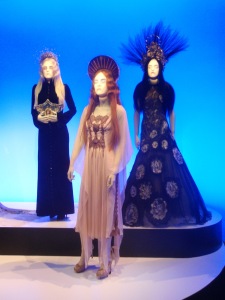
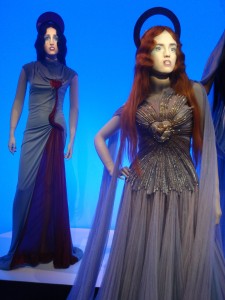
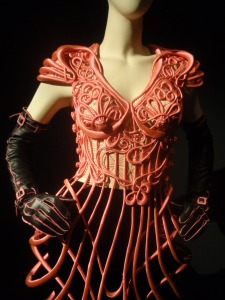
Last week while we were traveling Canada for vacation, my hb and I visited the fantastic exhibition “The Fashion World of Jean Paul Gaultier “From Sidewalk to the Catwalk” in the museum of fine arts.


This exhibition will travel to Dallas Museum of Art (November 13, 2011 – February 12, 2012),

the Fine Arts Museums of San Francisco, de Young (March 24 – August 19, 2012),

Thee Young (March 24 – August 19, 2012), the Fundación Mapfre – Instituto de Cultura, Madrid (September 26 – November 18, 2012) ,

and The Kunsthal Rotterdam, the Netherlands (February 9 – May 12, 2013).

The exhibition was fantastic not only to see the 140 garments which were shown but also the display with 30 of the dress models/ mannequins have animated faces.

The clothes are not just displayed on our average mannequin: in true avant garde style faces of those close to Gaultier are projected onto the mannequin’s modeled heads- Gaultier’s own countenance is even present on one lucky model (see video below, it is truly mind blowing). Thierry-Maxime Loriot, the curator at the Montreal Museum of Fine Arts explains the innovative method of display: “If you know Jean Paul Gaultier’s world then you see how creative and how alive and fun it is. It would be wrong to show his work only on boring mannequins.”

Copied from  http://www.stylelist.com/2011/06/24/jean-paul-gaultier-montreal-exhibit/

My husband took a lot of pictures (+ 130) of the garments ( allowed by the museum but no flashes)

You can see them all at  my flickr album

If you have the opportunity to see the exhibition please do, it is phenomenal.

I admire the designs but also the fantastic craft/workmanship from all the people who made those fantastic garments.

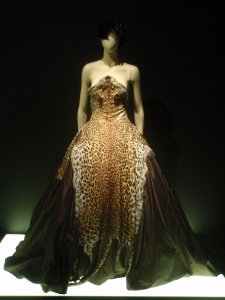
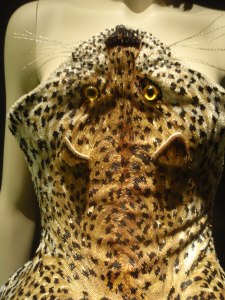
see this leopard skin dress’ which is made entirely from tiny beads embroidery.

6 months ago I watched the Arte documentary “The day before Jean Paul Gaultier”on Dutch television with Dutch subtitles, maybe you can watch it too via

AVRO Close Up portal – Close Up: The Day Before: Jean-Paul Gaultier.


September 2, 2009

Valentino Movie DVD release

Filed under: Couture Techniques,Designer,Georgene,Inspirations,Videos — georgene @ 9:23 pm

VALENTINO websized

I guess someone over at the Valentino movie PR firm read my review of The Last Emperor. We received a note about the DVD’s release, so my wish to own it is about to come true.

The description of the little mini movies included with the DVD look interesting; I know I am looking forward to seeing the extra glimpse into the atelier. Regardless of what you think of Valentino the man, or his style, the movie is a wonderful poem about the creation of beuatiful clothes. I can’t wait to hit the slow-motion, and the pause button, to study up a bit on some couture techniques.

gown
For those who might be driven to own a real Valentino dress, you can enter a contest to win a vintage Valentino gown from Decades in Los Angeles – all you have to do is send an email to enter. Who knows where that info may end up? I can imagine that your in-box might be filled with fashion and cinema related emails for the foreseeable future. Still, the gown is valued at $3200, and you get the DVD along with it. However, the drawing isn’t until January – I am not going to wait that long.

Next Page »

Create a free website or blog at WordPress.com.