Hemming can be done in a lot of ways, by machine or by hand.
If a garment needs an invisible hem like in woven fabrics, I prefer to hem by hand and to prevent any ridges from the outside I fold the hem edge back about 3/8 inch (1 cm) and work from the right to the left using a fine needle size 11 or 12 depending on the fabric weight. In this example I used Guterman thread and a needle size 11.
The sample pants is just one leg so it is small and can rest in my lap.
The stitches are sewn about 1/4 inch (6 mm) apart and with loose stitches.
I used a yellow thread for better view to show.
The hem allowance I use is a bit more than 1 1/2 inch ( 4 cm) , the hem allowance is marked with chalk and fold down and steam pressed.
For this example I used the same sample which I showed you for the post Fine Men’s Tailoring: pants hemming
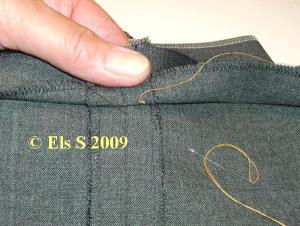
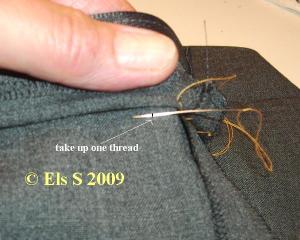

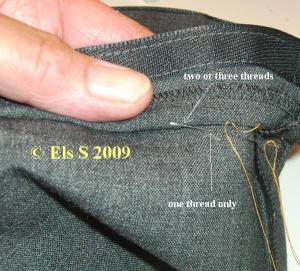

For unlined garments I sew an extra stitch every 3th or 4th stitch,


Inside view,

Outside view,
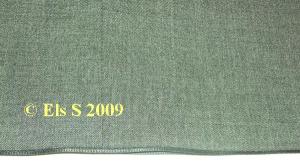
Suggestion:
When you want to press the hem again do it from the inside and press only the hem fold edge. Do not touch the hem edge with your iron to prevent a show true from the right side .
Sometimes it is easier if I keep my garment away from me on the table instead of in my lap so it looks like this.
For hemming this lightweight satin I used a size 12 needle and extra fine thread
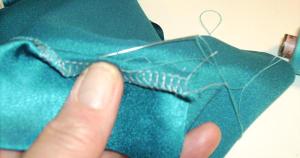
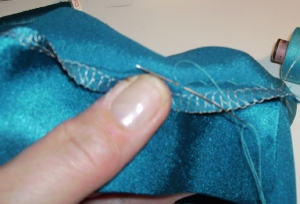
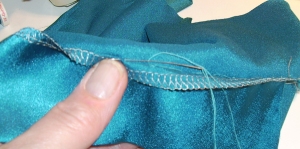
Wrong side view: Right side view:

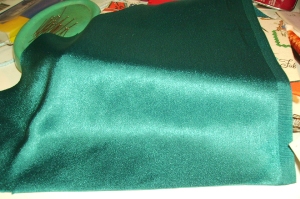
For a hem in garments where the lining hem is attached to the fabric hem, I use a 2 inch (5 cm) deep hem allowance and use the same hem stitch only this time I fold the hem edge back half way so 1 inch (2,5 cm) and use longer stitches about 3/8 inch (1cm) , there is no need to sew an extra stitch because the hem is secured by the lining hem.
The machine stitch line at the bottom is the attached lining .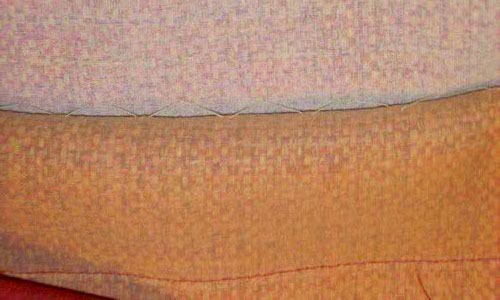


 Subscribe with Bloglines
Fantastic tutorial! Thanks!
Comment by Erica B. — July 15, 2009 @ 7:10 am
Brilliant idea to use a back stitch every several! I’d never thought of that, but I will do so from here out. I usually use a catch stitch to do my hems, simply because for me it’s more natural to start at the left and work to the right.
Comment by Gorgeous Things — July 15, 2009 @ 7:25 am
I can’t thank you enough for this tutorial. It was very helpful. The explanation was very clear. I will use this method in the future. I know it will improve the quality of my garments. Thank you again.
Yours Truly,
Trudy
Comment by Trudy Callan — July 15, 2009 @ 7:28 am
Great tutorial, Els. It’s so easy to see what you are doing with the pictures. I am sure many folks will find this to be beneficial to their sewn projects.
Comment by Mary Beth — July 15, 2009 @ 11:36 am
Beautifully clear! Thank you so much!
Comment by Summerset — July 15, 2009 @ 12:37 pm
Yep – what Ann said! I always put off re-hemming far too long so this trick will keep the whole hem from dropping!
Comment by Phyllis — July 15, 2009 @ 12:55 pm
Thanks for this! I *thought* I knew how to hand stitch a hem but I recently tried to fix a hem on some dress pants and it came out puckered and absolutely awful and an embarrassment for someone who sews! I will try again thanks to your tutorial!
Comment by Lori — July 15, 2009 @ 1:27 pm
It can help to thread trace the hem foldline over the chalk — at least it works for skirts.
Gorgeous Things: My understanding is that the catch stitch is also fine for many hems and is more elastic, perhaps making it more suitable for certain kinds of fabrics.
reply from Els
There are different ways to mark a fold line in hems,I use chalk for marking if the fabric permits chalk (brush away for the tailors chalk or I use the disappearing chalk which vanish by using steam) otherwise I thread trace but IMO there is no need to do both.
I never use a catch stitch to hem, I find it is not elastic enough and it can leaves marks and a ridge on the outside because of the amount of thread which is needed for those cross stitches.
Comment by Reader — July 15, 2009 @ 4:01 pm
Exquisite work…just lovely.
Comment by Pam ~ Off The Cuff ~ — July 16, 2009 @ 8:29 pm
Great article, Els. I remeember when you explained this technique to me (I believe I was making my Armani coat knock-off and having some trouble hemming the coat); I’ve been following your advice ever since.
Comment by Tany — July 18, 2009 @ 3:07 pm
Hello diva Els. Your tutorials are very clear and informative. Thank you. I have seen garments lately where the buttons seems placed wrongly, looks too small or too big or something is “off” but I cannot put my finger on exactly what might be wrong. I would love to see a “definite” button tutorial from you. Regarding size, placement, marking, sewing on with cross-stitch/paralell stitch and such. I have seen you post something about placement of button from the edge and would love to know more about buttons and how to use them correctly.
Cheers Vibeke
Comment by Vibeke in Oslo — July 19, 2009 @ 3:46 pm
This is wonderful, thank you. I’ve only recently fallen *in love* with hand sewing, only to find very little “how to” on the internet, and no clue what type of literature to obtain! Would love to take classes and learn couture :^). Why is this such a difficult area to pursue??! Hopefully, I’m not too old to start!
Would be great if you could post more hand-sewing tutorials.
Comment by Lilo — July 27, 2009 @ 7:43 pm
[…] to cover the activator button. I matched an equally sized piece of felt to the back and began to hem stitch the two black pieces together. NOTE: For a hem stitch to be used effectively, the piece must be […]
Pingback by Tv-b-gone plushy, or Why I don’t sew… » MAKE @ Parsons — February 9, 2010 @ 8:32 pm
[…] Mary, and Els are the Sewing Divas; they have made this fabulous tutorial on how to make a simple hand slip stitch. There is even mention of how to hem lined garments, where the lining is attached to the garment […]
Pingback by Hand Hemming Stitch « ShopBritexNotions & Britex Fabrics — May 11, 2010 @ 5:29 pm
[…] […]
Pingback by Weekly Sewing Digest - 5/14 - Hand Sewing! - Frugal Village Forums — May 14, 2010 @ 10:25 am