by Diva Els

There are several ways to make an inverted kick pleat. The most common finish is to topstitch the folded pleat on both sides of the stitching line from the right side. There is nothing wrong with that way but as a custom clothier I was trained to finish the pleat without topstitching.
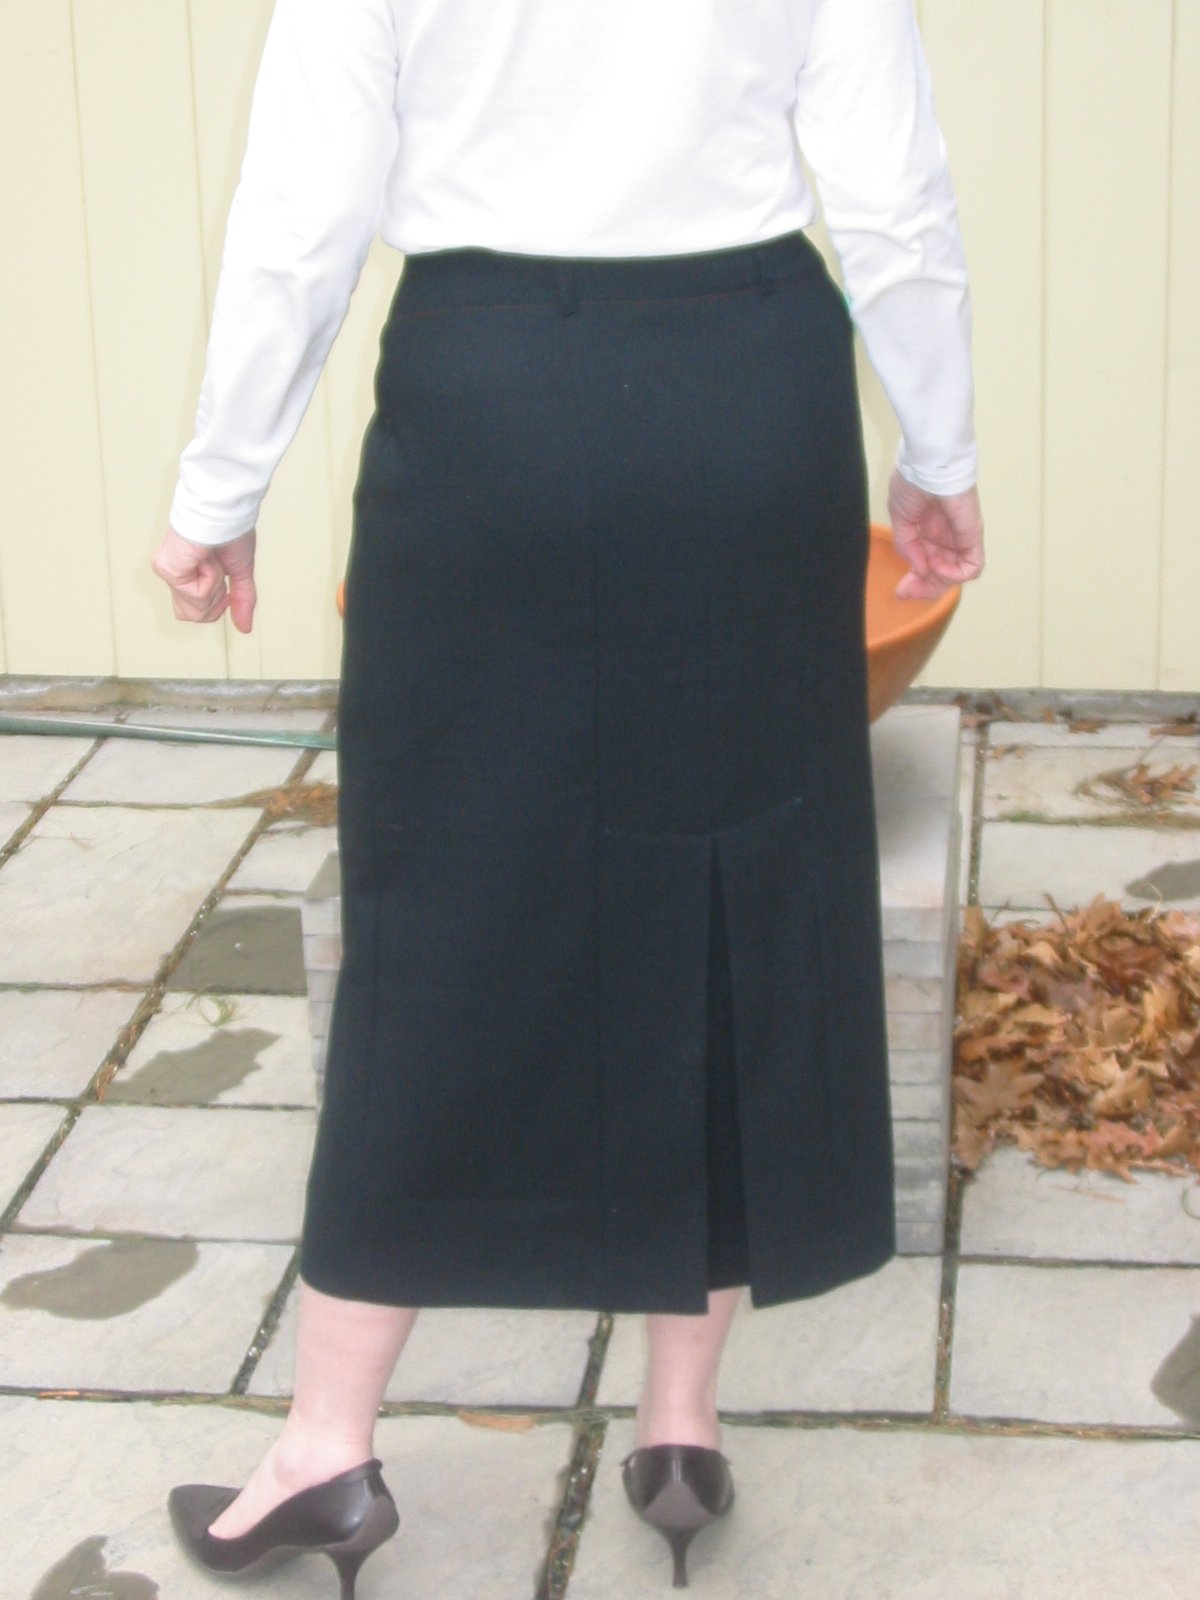
Diva Phyllis suggested that I link to her version of Hot Pattern’s Classix Nouveau Trouser-Skirt to demonstrate the topstitched method. Phyllis showed us this skirt in her beautiful Lace Secrets entry in May 2006. And here’s her review of the pattern at PatternReview.com
Thanks, Phyllis!
Step 1
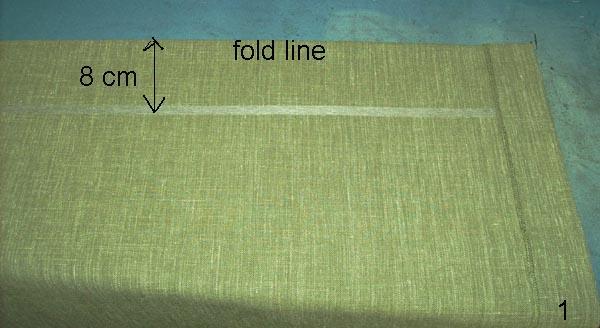
Above is how I made an inverted pleat with a depth of 8 cm and a length of 26 cm.
The hem is already finished. For those using the imperial system of measurement you can convert my measurements here
The fold line has been pressed and I have marked the pleat line at 8 cm from the fold line with chalk and applied a narrow piece of fusible interfacing to reinforce the pleat and stitching line.
Step 2

I stitched the center back (or where ever you are adding the pleat) seam line ending 26 cm from the hem. (You can make the pleat as deep as you wish but 8 cm is the depth I used for
this example) I then changed the stitch length and tension to a basting stitch and stitched straight down to the hem The vertical chalk mark is where the pleat starts. Next I draw a chalk line at 4 cm from the fold line so I know exactly my pressing line.
Step 3
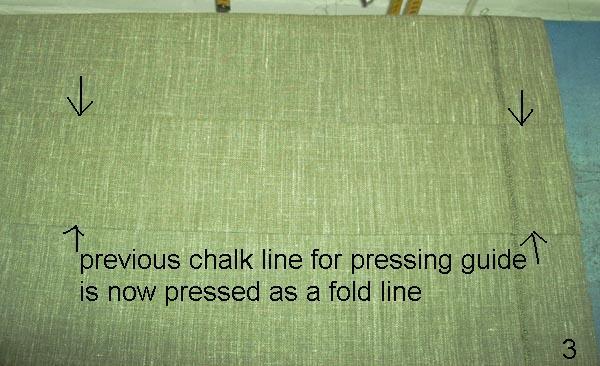
Here is the inverted pleat, opened and pressed.
Step 4

I marked the beginning of the inverted pleat and draw a diagonal line on both sides of the pleat depth , this will be my guide line for stitching the pleat in place. The stitching is done in two steps on each of the pleat halves.
Step 5

You can see how the stitching is done to the center of the pleat only .
Step 6

And from the other side of the pleat.
Step 7

Here you can see the stitching line that holds the pleat in place.
Step 8
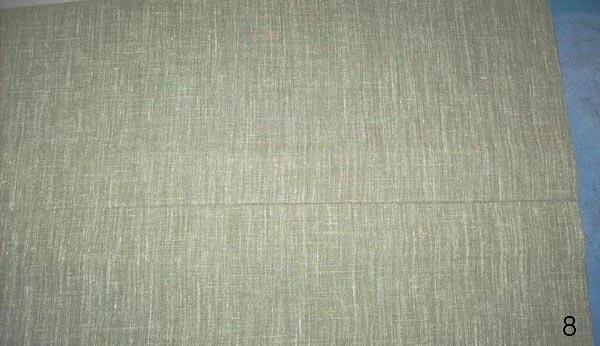
The finished inverted kick pleat on the ironing board.
Done!
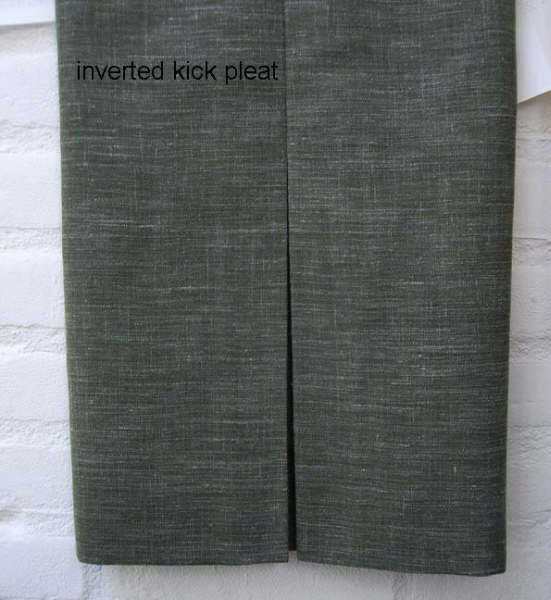
Inverted pleat done without topstitching as it looks from “the public side”.

 Subscribe with Bloglines
Woohoo, very nice tutorial! Thanks, Els.
Comment by Mary Beth — June 6, 2006 @ 3:17 pm
Wonderful tutorial, Els. Thank you! I’ll definitely use this method on the next skirt I make.
Comment by Gorgeous Things — June 6, 2006 @ 5:15 pm
That is an awesome tutorial! Thanks a lot!
Comment by Erica B. — June 6, 2006 @ 6:25 pm
Els, that is a wonderful tutorial! I will print this out for my techniques binder. Thank you!
Comment by Gigi — June 6, 2006 @ 6:53 pm
Hai Els.
Dit ziet er mooi uit!! Om op deze wijze een “stolpplooi”
, of andere technieken uit te leggen zouden we op onze site ook veel meer moeten doen.
Groetjes Neeltje
Comment by Anonymous — June 7, 2006 @ 4:13 am
Els this is a work of art! And it’s very helpful too ecause the pattner doesn’t have any illustrations of this step.
Comment by Phyllis — June 7, 2006 @ 4:41 am
Els, can we have this “construction of an inverted kick pleat” on our own website too?
And I’d like to wish the ‘Sewing Divas’ lots of success.
On behalf of the Dutch Federation for men & women’s tailors; BVK
Comment by Peter — June 7, 2006 @ 5:03 am
Nice pictures, I like the way words are superimposed, clear drawings
Comment by Anonymous — June 9, 2006 @ 6:11 pm
Thank you so much! This tutorial is very helpful, especially with the photos.
Comment by Kaelha — August 6, 2009 @ 2:37 pm
how about vented kickpleat or inverted vented
kickpleat?
pictures?
Comment by florienne — September 14, 2009 @ 9:11 pm
Thanks so much.
I had an old jean skirt pattern, but love a lot of the kick pleats I see in Miss Marples Mysteries. Back to being feminine.
Besides did not want a slit almost up to my bottom.
Knew there was a way, but brain just would not work today, so THANKS AGAIN FOR THIS POST.
Comment by Nana's Knoll — September 23, 2009 @ 2:18 pm
Nana’s Knoll, you’re welcome.
Comment by Els — September 23, 2009 @ 3:58 pm
[…] February 6, 2010 After conferring with Els about my inverted pleat, she directed me to an old post at The Sewing Divas. How could I have forgotten that?!?!? Brilliant, right? Els recommended that I […]
Pingback by McCall’s 5984 – Tweaking the Pleat « Gigi Sews — February 6, 2010 @ 12:31 pm
Do you have any tutorials on adding a kick pleat to an already existing slit in a skirt. All I seem to find are written instructions and I do not do well with out step by step and pictures.
I sewed your kick pleat in another skirt and it came out perfect. Thanks for the great tutorial.
Comment by Nina — March 17, 2010 @ 1:20 am
The above question about adding kick pleat to a slitted skirt. HAVE A DIFFERENT EMAIL
nledford60@gmail.com
Comment by Nina — March 17, 2010 @ 1:21 am
sewing a inverted kickpleat
larger buttons on skirt tabs??
Comment by florienne — November 4, 2010 @ 10:35 pm