![]() This work is licensed under a Creative Commons Attribution-Noncommercial-No Derivative Works 3.0 Unported License.
This work is licensed under a Creative Commons Attribution-Noncommercial-No Derivative Works 3.0 Unported License.
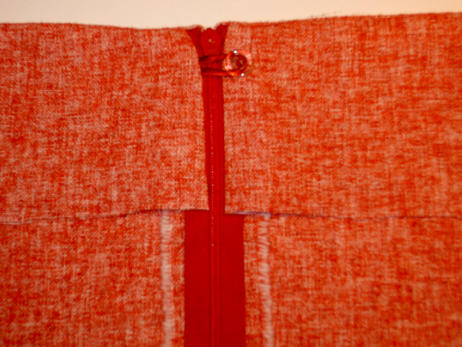
There are a lot of ways to sew a facing in a garment with an invisible zipper.
I will share my way of finishing a facing with an invisible zipper this be used for any facing, like a faced neckline, skirt or pants waistline. I always add a small flat button and fabric loop at the top to reduce the stress of the zipper. (the fabric loop is made of bias cut lining and steam pressed into a small flat loop shape)
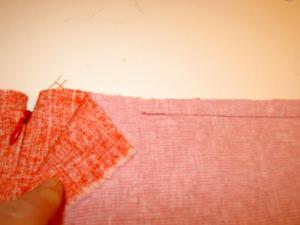
Cut the facing the same length as the waistband including the seam allowance.
Sew the facing at the waistband but leave the first 3 inches (7,5 cm) from the zipper on both sides free, these will be sewn later.
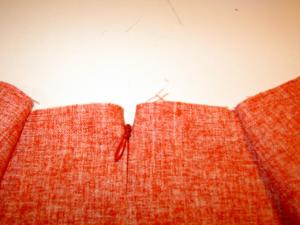
If you want to add a button and fabric loop, sew the fabric loop at the zipper tape about 1 cm below where the zipper pull if the zipper is zipped up. For this example for a skirt I sewed it at the left side.
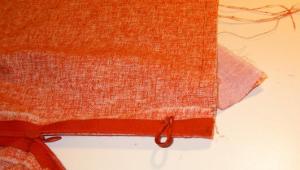
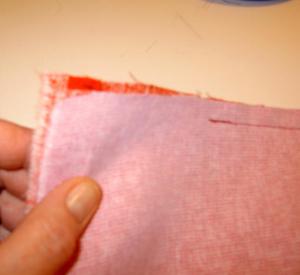
The facing seam allowance at the top should be moved/angled about 1 cm away from the seam allowance of the zipper.
The lower part of the facing matches the seam allowance.
Sew the facing at the zipper tape
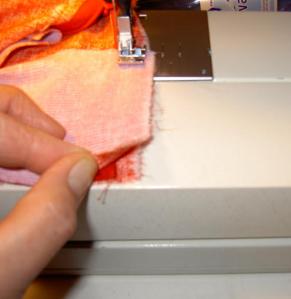

If you plan to line the garment, do not sew the last ½ inch (1,5 cm) from the facing, so you can insert the lining at the facing bottom later.


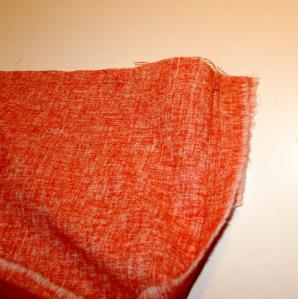
Push the zipper coil flat and fold the zipper towards the facing part.


Stitch the remaining facing at the waistline but do not back stitch.

Turn the facings to the inside, and check if the stitching line of the facing is even.
If the facing is even on both sides turn the facing again towards the inside and back stitch , grade the seam allowances and cut the corners at an angle.
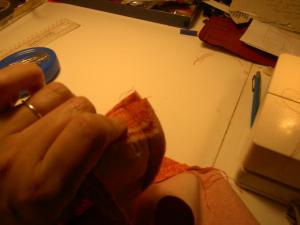

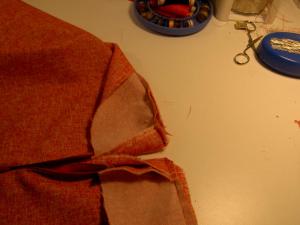

Finish the faced zipper by sewing on a flat button.


 Subscribe with Bloglines
Fantastic tutorial as always, Els. Thanks!
Comment by Gorgeous Things — December 11, 2008 @ 5:46 pm
Such a nice finish. Thank you so much for the tutorial! I have done the button/tab before for some skirts for my daughter and it such a smart and easy addition to the skirts.
Comment by Summerset — December 11, 2008 @ 5:48 pm
I haven’t done the button – an hook and eye but this is much prettier. Thanks for the tutorial.
Comment by vicki — December 11, 2008 @ 7:38 pm
Thanks for this tutorial. I like the idea of using a button and button loop.
Comment by Lorelle — December 11, 2008 @ 8:35 pm
You make this look soooo effortless. Thanks for posting
Comment by Dina — December 11, 2008 @ 11:53 pm
Thank you so much for this tutorial. I’ll put it into practice next week.
Comment by Maree — December 12, 2008 @ 1:53 am
What a tutorial! Thanks Els.
Comment by Linda T — December 12, 2008 @ 2:38 am
Thank you Els for putting this tutorial up here. Is there any way you can explain a little more how to do the loop? Do you saw a narrow tube and then turn it? And then thin it out by steaming and pulling? Or am I understanding that wrong?
Comment by Natalija — December 12, 2008 @ 5:38 am
Heel mooi, eenvouding, handig, en meer prachtig dan zonder enetje. Bedankt Els.
Comment by Katharine in Brussels — December 12, 2008 @ 2:54 pm
Another very useful tutorial, Els. Thanks!
Comment by Cindy — December 12, 2008 @ 5:44 pm
I’ve been using this method since you first taught it to me. Thanks again for sharing your superior expertise!
Comment by Tany — December 16, 2008 @ 11:01 am
I loved your tutorial! Very thorough :). This is my first time on your blog, too, and I love it!
Comment by Happy Place Design — December 18, 2008 @ 7:11 pm
Thank you, thank you, thank you!
Comment by gooduniverse — December 20, 2008 @ 6:46 am
I just di it, It came out PERFECT!! Thank you VERY much.
ROMINA
Comment by Romina — January 31, 2009 @ 2:00 pm
I’ve got an invisible zipper that is already sewn in that came off it’s tracks. Got any tips on how to fix this??
Comment by Alisha — March 12, 2009 @ 2:51 pm
[…] have found a way to have the zipper go all the way up to the top of the waistband. It is similar to Els’ tutorial on facing an invisible zipper, with the addtion of a full […]
Pingback by Not Adding to Fluff « The Sewing Divas — March 26, 2009 @ 10:35 pm
This article was written was the wand of a lot of my help. Thank you very much, I’ll study a lot.
Comment by startrekdvd — April 6, 2009 @ 11:13 pm
Ah your very good article and support! Also hope that the cause of you getting better and better every day happy!
Comment by startrekdvd — April 6, 2009 @ 11:32 pm
Thank you so much for this fantastic tutorial, Els. I am using it today on a skirt that I am finishing.
Comment by Jennifer — July 8, 2009 @ 4:54 pm
Els, this AM I found where I bookmarked this tutorial and was able to use it on my latest skirt sewing project. It worked like a charm and know that I will use it again for future projects. Thanks for taking the time to share your sewing knowledge with all of us.
Comment by Linda L — August 30, 2009 @ 4:19 pm
[…] If you want to use a facing and want to learn how to finish this, see my post […]
Pingback by Sewing Invisible Zipper « THE SEWING DIVAS sewing, design, fashion — December 10, 2009 @ 7:39 pm